- 相關網址 http://portable.easylife.tw/3966

Genymotion Android 模擬器最近使用的人似乎還不少,也是本站的熱門文章之一,不過自從版本升級到 Genymotion 2.0.1 之後,預設就沒有搭載 Google Play,這讓許多玩家在安裝 App 遇到了障礙,本篇文章就來簡單的教導大家如何自己安裝 Google Play,也是非要學會不可的技巧唷!不然什麼 App 都不能安裝要幹嘛?
事前準備
請先完成 Genymotion 的安裝與運作:https://ez3c.tw/3849
下載 Android SDK:http://developer.android.com/sdk/index.html
直接下載 Windows 32-bit Android SDK:這裡
直接下載 Windows 64-bit Android SDK:這裡
(下載後請解壓縮)
下載 Google Play 商店安裝程式:這裡,請選擇適合的版本下載安裝
4.3 版本直接下載:這裡
(下載後不用解壓縮)
安裝步驟
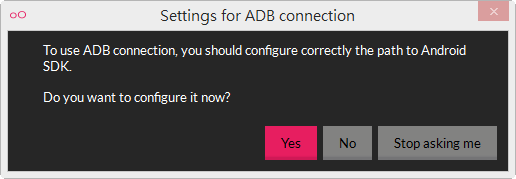
△ 在預設的狀態下,Genymotion 並不會設定好 Android SDK,因此在開啟模擬器的時後會出現是否要設定的通知,這時後請選擇 YES。
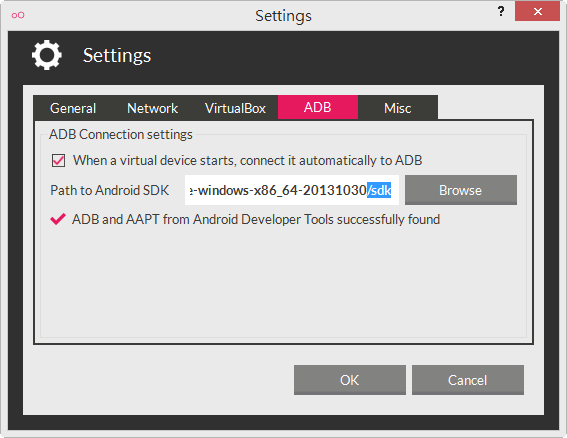
△ 在 ADB 的設定中選取剛剛下載解壓縮後的 SDK,路徑剛好到 /sdk 那一層目錄即可,這確設定的話最後一行會打勾勾的標記。
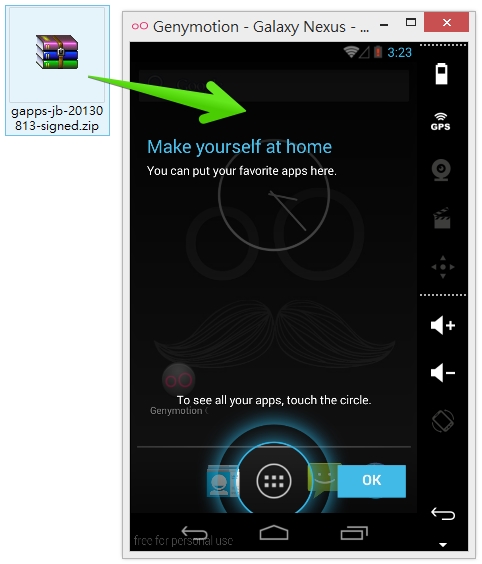
△ 當模擬器開啟之後,將剛剛下載的 Google Play 商店安裝程式拖曳到模擬器之內,等同於執行安裝的動作。
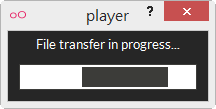
△ 檔案傳輸中
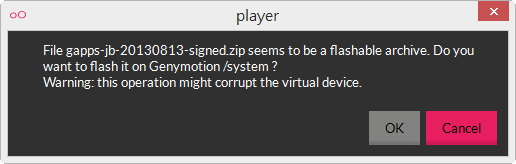
△ 即將進行刷機的動作,這個步驟請選取 OK。
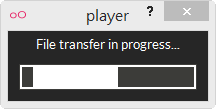
△ 又會繼續出現檔按傳輸,此時開始進行刷機動作。
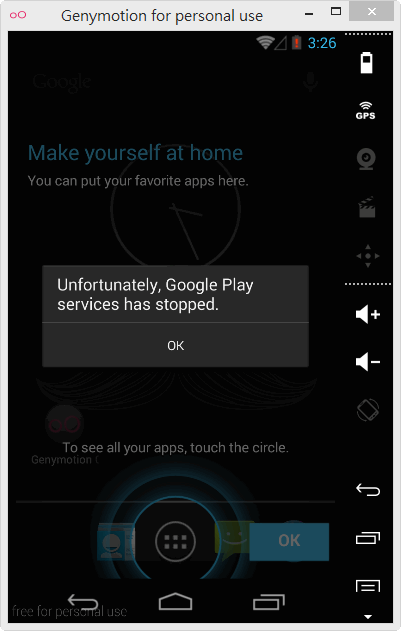
△ 接著模擬器上會出現「Unfortunately, Google Play services has stopped」。

△ 刷機動做完成,這時後請你將模擬的 Android 重新開機,

△ 開機過程中會看到 upgrading 的訊息,等待跑完就大功告成。
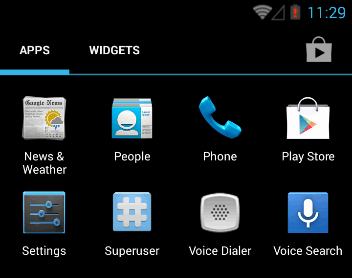
△ 就可以在 APPS 當中看到 Play Store 囉!

